So, you’ve got your website up and running. That’s amazing! But what’s next? You want people to actually find it when they search online, right? Instead of blowing your budget on ads (that’s what Search Engine Marketing, or SEM, is for), you can harness the power of Search Engine Optimization (SEO). It works wonders!
SEO involves a bunch of strategies to boost your site’s ranking on search engines. And yes, it can be a bit technical. But don’t worry – there are fantastic tools that make it easier for you.
Got a WordPress website or a Showit website with a blog? The Yoast SEO plugin could be your secret weapon. Seriously, it’s a game-changer for showing up on Google!
What is Yoast SEO?
Yoast is a fantastic tool for WordPress that boosts your website or blog’s online visibility.
Think of it as a traffic light system that uses color codes and a checklist to guide your improvements. Green means you’re rocking it! Orange? A small tweak is needed. Red? It might take some extra effort, but hey, you’ve totally got this!
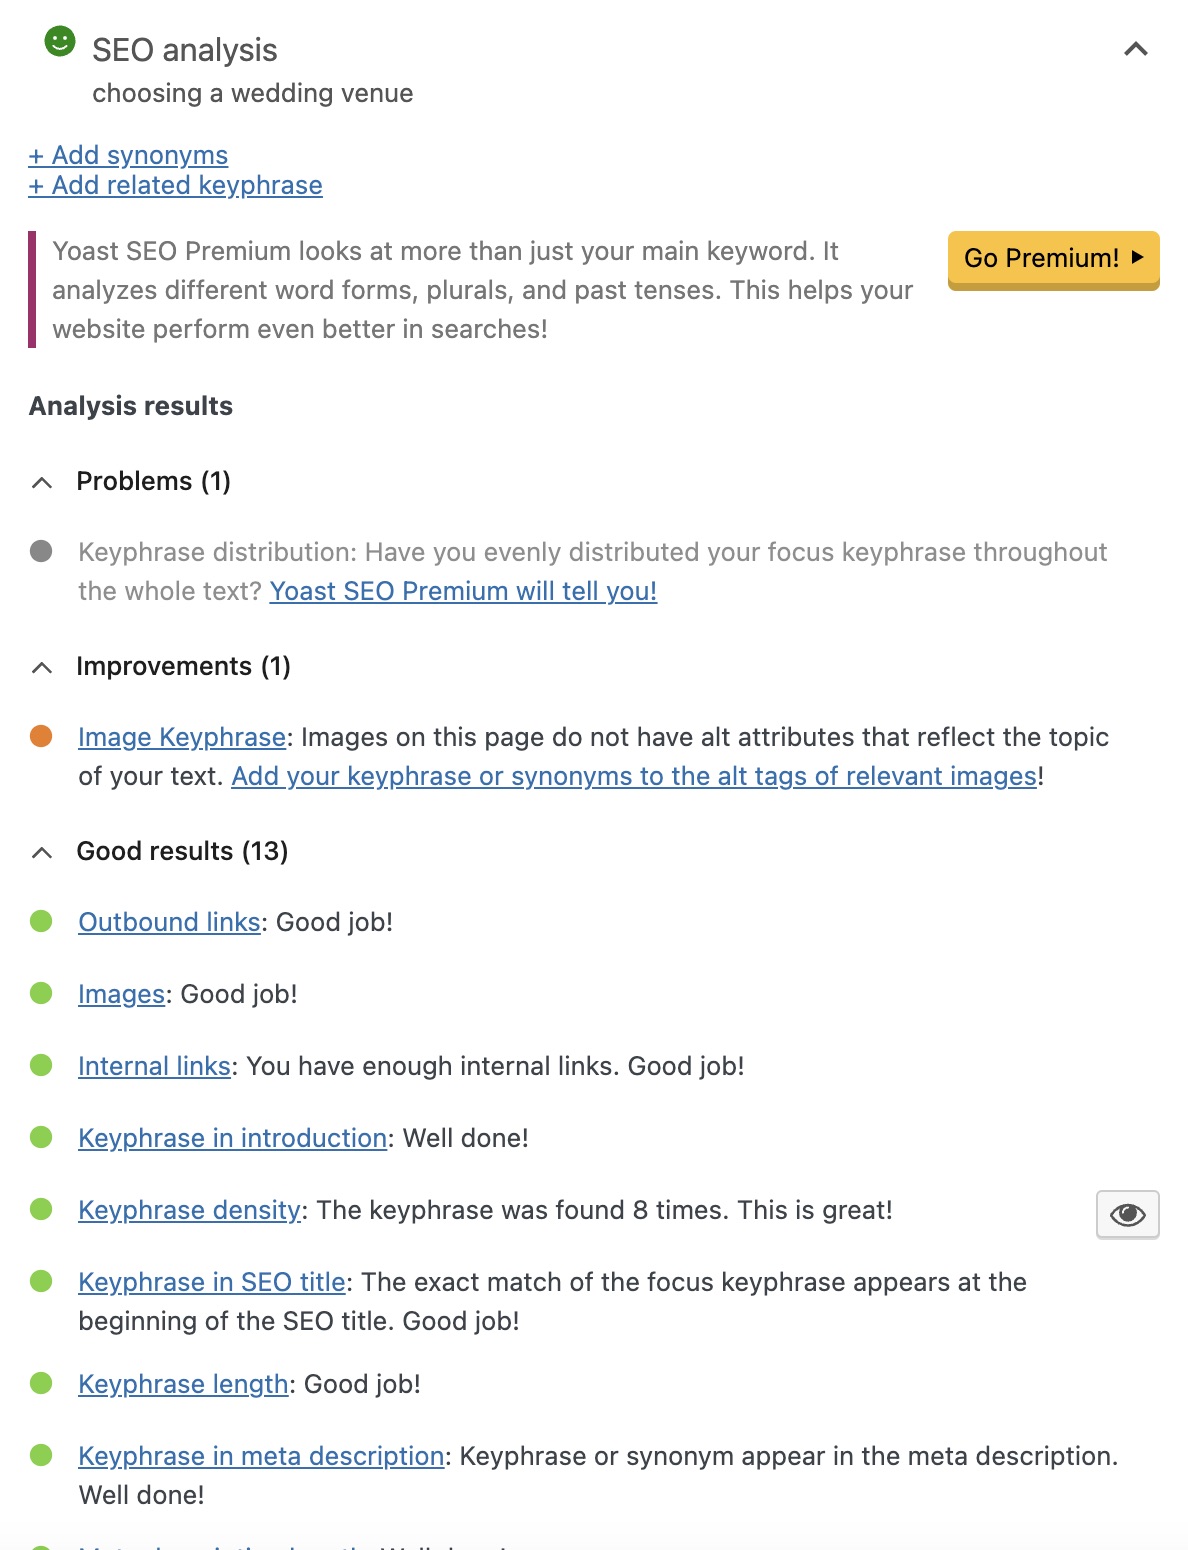
Quick tip: If you’re using Showit, the built-in SEO tools have your web pages covered. But definitely turn to Yoast for optimizing up your WordPress blog posts.
While Yoast has both free and premium options, I’ve found the free version plenty useful without spending extra.
Yoast SEO features you’ll love
So, what can Yoast do for you? Let me break it down:
- It provides an SEO analysis of your blog post to align with SEO best practices.
- It provides a readability analysis to ensure your content is easy to read.
- It lets you come up with your blog’s title and meta-description, giving you control over its appearance on Google.
- It notifies Google whenever you publish new content.
How to install Yoast SEO in WordPress
Have a basic blog on Showit? No setup needed; Yoast is already installed for you. If you’re on the Advanced blog plan or using WordPress without a Showit website, just follow these steps:
- Go to Plugins –> Nwe plugin
- Search for Yoast SEO in the search box
- Click on ‘Install now’
- Activate the plugin
And you’re done! Yoast will show up at the bottom of all your pages and blog posts.
Optimizing your blog posts with Yoast SEO
With Yoast now part of your toolkit, you’re ready to enhance your blog posts! When writing a blog post, simply scroll down and that’s where you’ll see the Yoast SEO plugin.
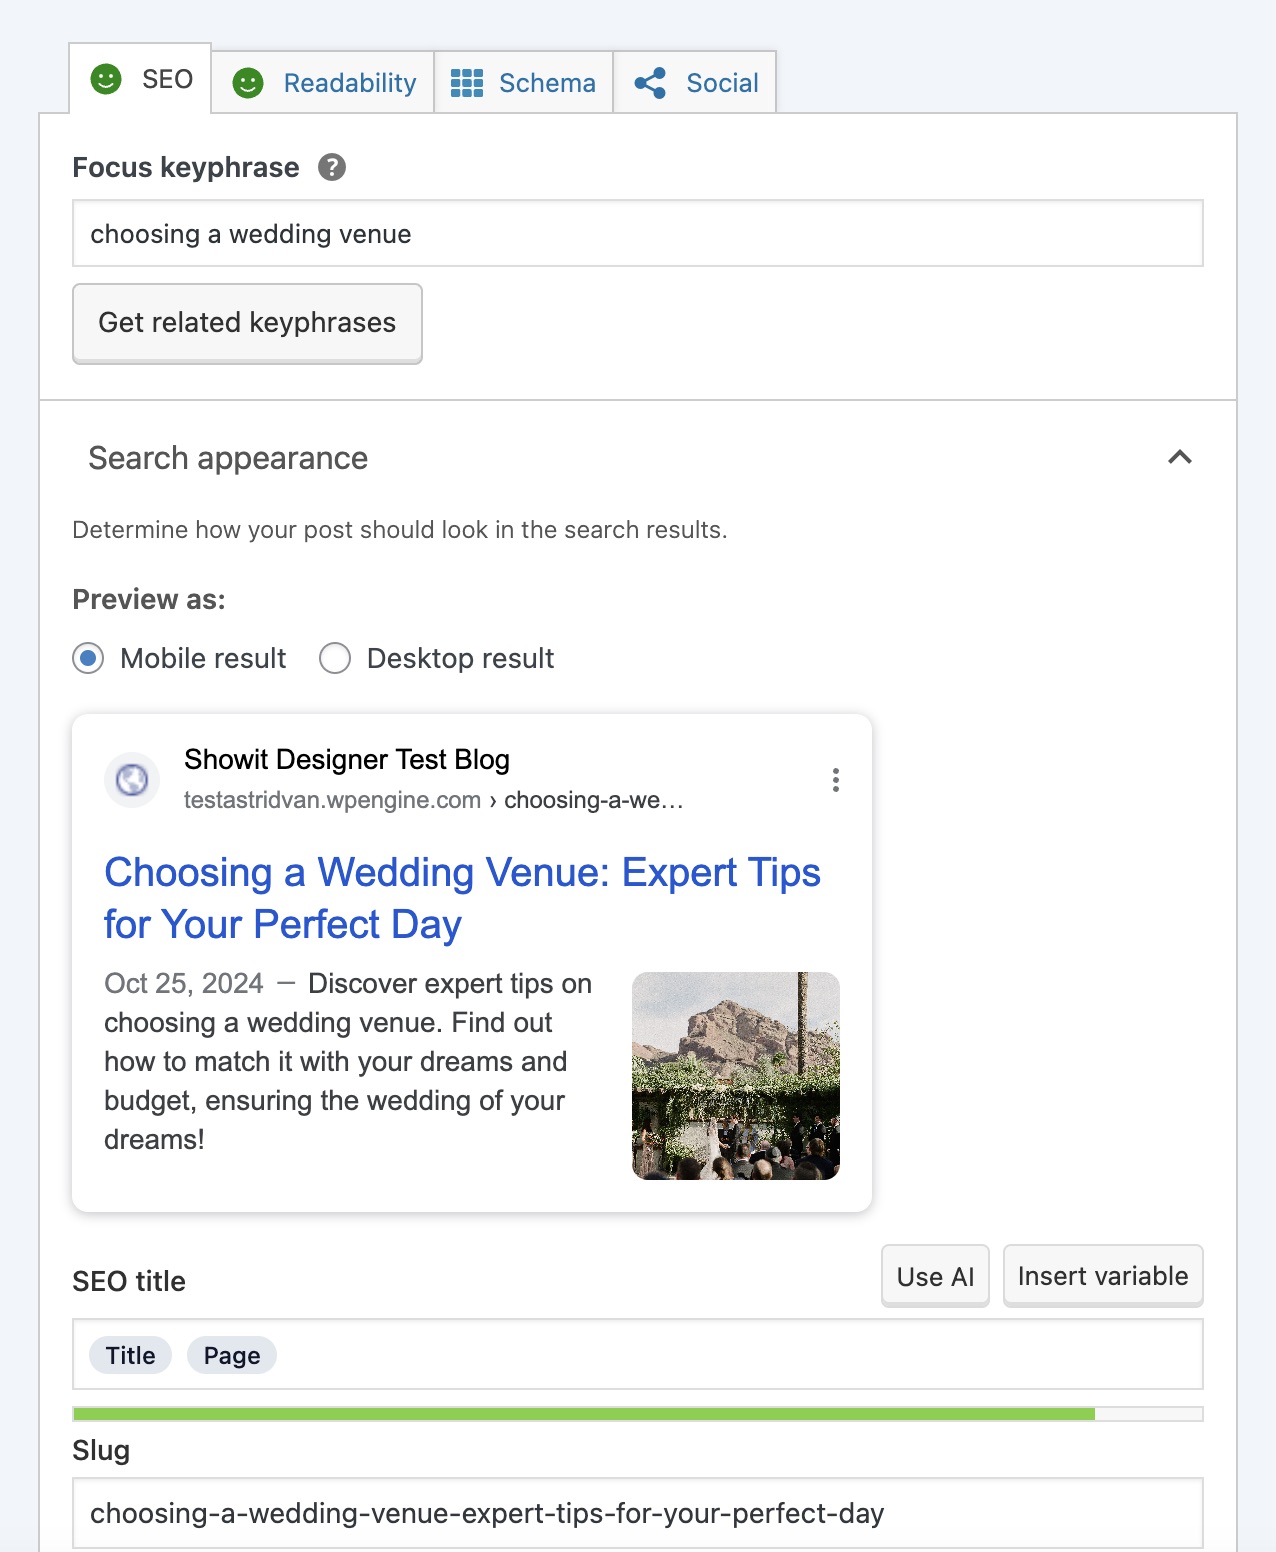
Set your focus keyphrase
To kick things off, choose a keyword you want to rank for (also known as a focus keyphrase). Say you’re crafting a piece about top lenses for portrait photos – ‘best lenses for portrait photography’ could be spot-on.
💡 Pro tip: it’s always good to back up your keyword choice with actual data. A great tool to help you in choosing a good keyword is UberSuggest. It provides you with a keyword analysis, competitor analysis and much more!
Write your blog post
Now that you’ve got your focus in place, let’s dive into writing. Here are some tips:
- Integrate your keyword consistently across the content—maintain a balanced frequency.
- Aim for at least 500 words. Google’s sweet spot is around 2,000.
- Use subheadings (h2 and h3) to structure your content.
- Divide your text into paragraphs to enhance readability.
- Add links to other parts of your site (internal links) and to other websites (external links).
- Mix in images and don’t forget to optimize them!
Set your SEO title, meta description & slug
Now, head over to the ‘Search appearance’ part in Yoast and add your metadata.
You’ll see a preview of how it would look like in Google:
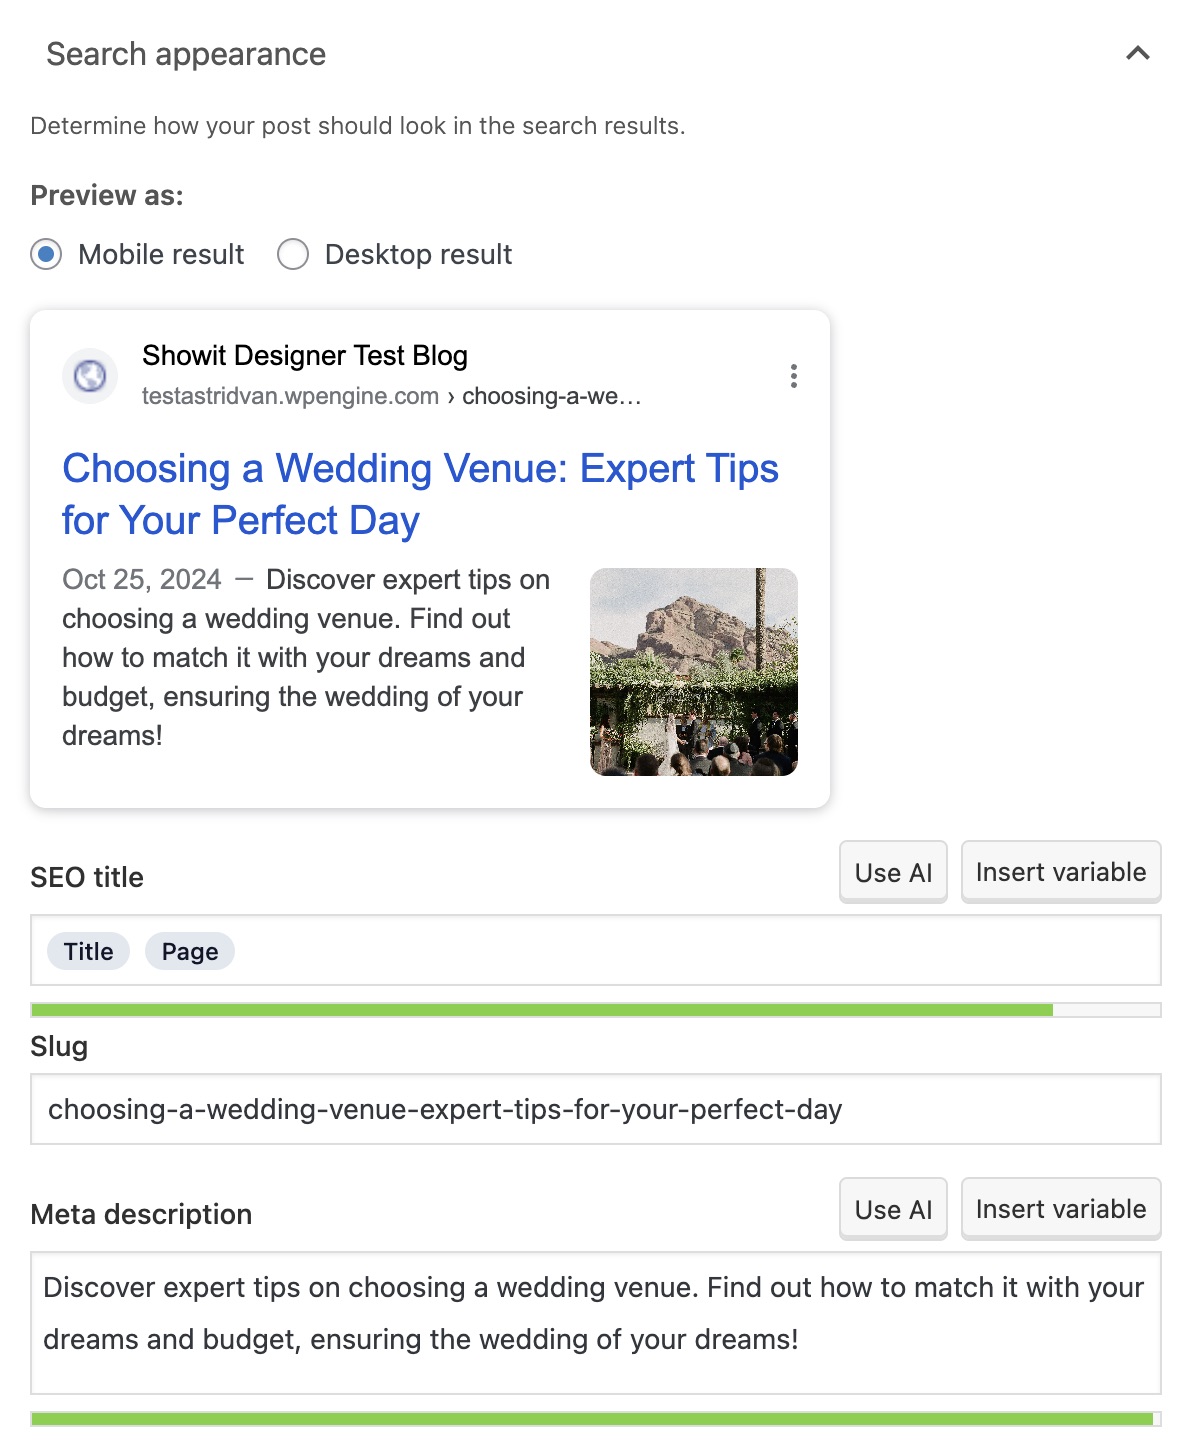
First off, you want to set your blog post title. Make sure to put your focus keyword in it, and if possible, put it in the beginning of the title.
Next, refine the slug – this is your URL’s tail end. It’s all about simplicity and keyword integration. For example, if your title’s “My Favorite Lenses for Portrait Photography”, your slug should be ‘/favorite-lenses-for-portrait-photography’.
Finally, craft a compelling meta description with your keyword. Yoast guides you on word count, keeping it just right. Isn’t that convenient?
You’ll know you’re set when both the title and meta description turn green!
Dive into the SEO analysis
After writing your blog posts, check the SEO analysis in Yoast. Green means good to go, while orange and red highlight areas needing your attention.
Not every orange or red indicates must-fix issues. As long as you’ve got an overall green light, you’re good!

Review the readability analysis
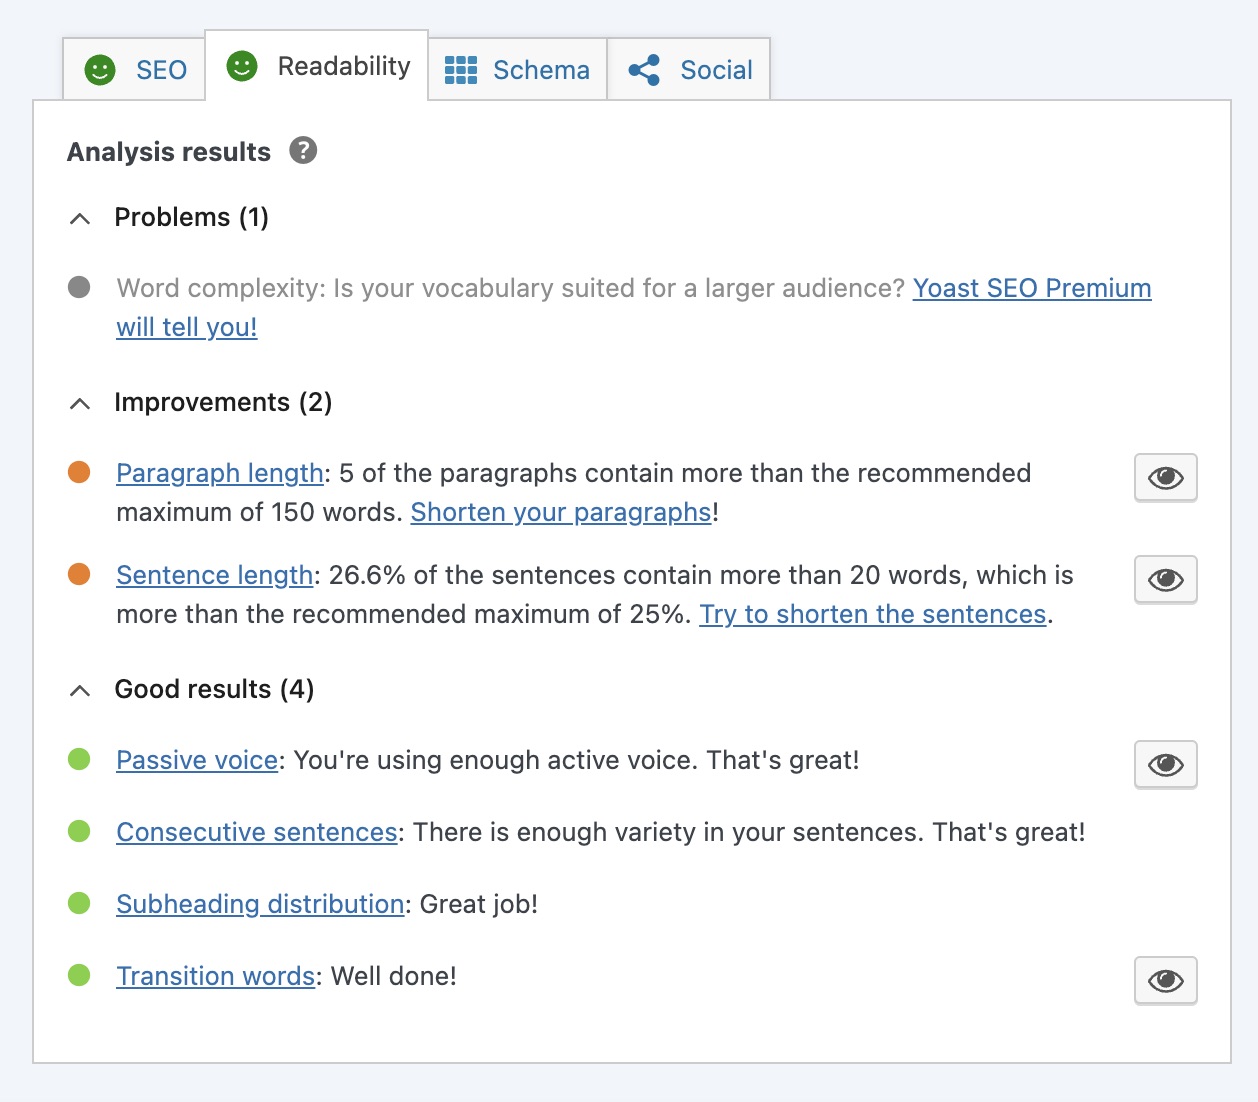
Lastly, take a look at the readability analysis – it’s your best friend in understanding where you might be overdoing things, like starting too many sentences the same way.
Use Yoast to enhance each blog post, and take the time to update your previous ones for better results. Now that your site is geared for success, kick back and watch your website traffic increase!
Ever wondered what tools I rely on daily to keep my website, marketing and workflow running smoothly? I've put together a list just for you so you can spend more time doing what you truly love!
My favorite tools & resources for creatives
Read more ...
