Did you know that if you optimize images for SEO (search engine optimization), you can significantly boost your Google ranking? Grabbing that top spot on Google can seem like a challenge, but optimizing your images is a great place to start!
In this blog, I’ll give you a short introduction on search engine optimization and how you can optimize your images for SEO. Ready? Let’s dive in!
What is SEO?
So, what’s SEO all about? SEO, short for Search Engine Optimization, is all about using specific strategies to help your website climb higher in Google’s organic (free) search results. And knowing that a roughly 40% of clicks go to Google’s top result, wouldn’t you want your website to snag that prime spot?
Improving your website’s visibility in Google is about more than just optimizing your images. It’s also about:
- Optimizing website copy for keywords
- Making sure your website loading in under 3 seconds
- Keeping your site secured and protected
- Use link building strategies
- … and more.
Truth bomb: SEO is not a “quick fix”. Some techniques can be implemented swiftly – like optimizing your images – but don’t expect them to catapult you straight to the top. Be cautious of companies promising quick results – they’re usually too good to be true.
Think of SEO as a long-term commitment, like nurturing a beautiful garden over time. It takes patience, a bit of love, and the right strategy to watch it grow and thrive. Focus on creating engaging website content (maybe even bring in a SEO copywriter) and blogging about topics that resonate with your audience.
Why optimize images for SEO?
Let’s talk about why optimizing images is key to your site’s success.
First off, images often cause a website’s load time to slow down. So, you want to optimize your images for loading speed! Not only do fast-loading pages make Google happy, it also keeps your visitors smiling. No one likes twiddling their thumbs while waiting for a slow site to load, right? If it takes over 3 seconds, potential customers might just peace out, and that’s a missed opportunity at more clients and sales.
Second, you want to optimize images for SEO so Google can “read” them better. Think about it – Google’s is a bot and doesn’t see images like we do. By sprinkling in some metadata, you’re giving your images extra context and relevance, which boosts your Google ranking.
Check your website’s speed with these (free) tools
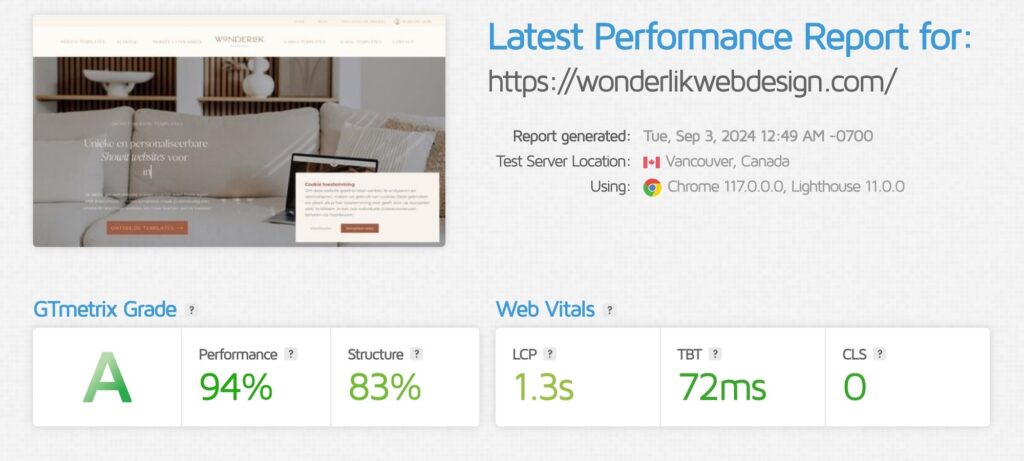
Want to see how quick your site is? There are some fantastic free tools out there that give you insight on your website’s loading speed and help you optimize images for SEO. Here are a couple of my top picks:
Both of these tools point out which images are oversized and need a bit of optimization, helping you focus on making your images SEO-friendly!
How to: optimize images for SEO
1. Pick the right file type for your images
Choosing the right image file type is crucial for your website’s performance (and ranking).
Here’s a quick guide to help you decide:
- JPG: best for regular images, this is your go-to file type because it’s a rather small in size.
- PNG: best for graphics, logos and images with transparency – use use them sparingly to avoid slowing down your site.
- SVG: best for logos, icons and illustrations – usually small file sizes.
- GIF: best for animated graphics and images – very big file size, so avoid using them!
2. Resize your images
A tip that many people forget is to resize images. Not so much in file size, but in dimension.
Too often, I see photographers upload photos that are about 6000 pixels wide, and that’s simply way too big! Those big photos obviously come with hefty file sizes. And simply shrinking the dimensions can already make a big difference.
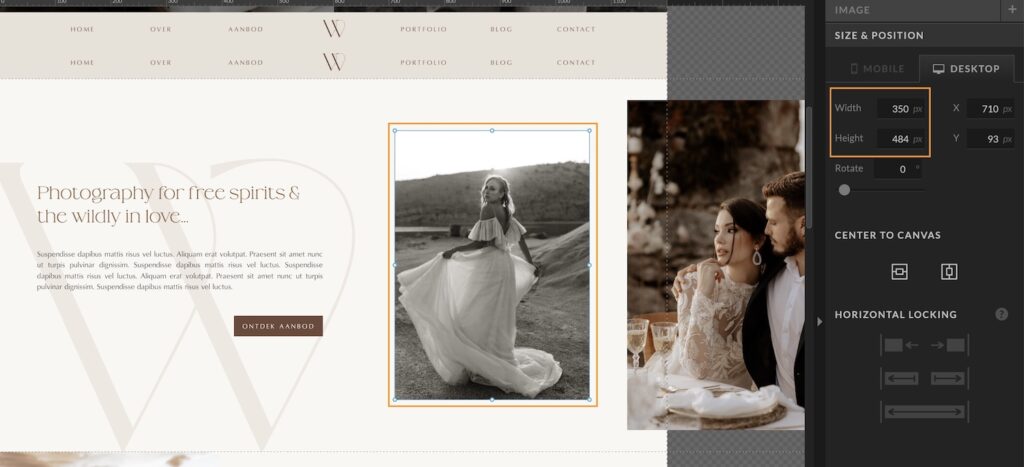
So, what is a good dimension? Well, an image on your website should ideally be at least twice as big as the canvas you’re placing the image in. Let me show you with two examples.
Let’s look at an example from my Showit website template Wild Willow. In Showit, the image dimensions are 350×484 pixels, so you’ll want the original picture to be 700×968 pixels. But don’t worry – you won’t need to calculate this for every single image!
My advice? Aim to upload images with a max. dimension of 1500 pixels wide or high in Showit.
However, this does not apply to images that take up a full screen (banner images, background images). These need to be adjustable depending on the screen size. A page is 1200 pixels wide in Showit, so this means your image should be at least 2400 pixels wide. As long as you are between 2400 – 3500 pixels wide, you’re good.
3. Compress your images for SEO
Before you upload your images to your website, it’s smart to give them a little compression makeover to keep the file size as minimal as possible. Smaller images mean quicker website load times, which is exactly we all want!
My rule of thumb: aim to keep your images around 250kb. Don’t stress if you hit 400kb now and then – it’s just a helpful target, not a strict rule.
There are plenty of free tools out there to help you compress your images:
Compress JPEG images
One tool that’s perfect for compressing JPG photos is TinyJPG. What I absolutely about it? It’s free (oops, my inner Dutchie is coming out 🙈). However, keep in mind it limits you to uploading 20 images at a time, with each image being no larger than 5GB.
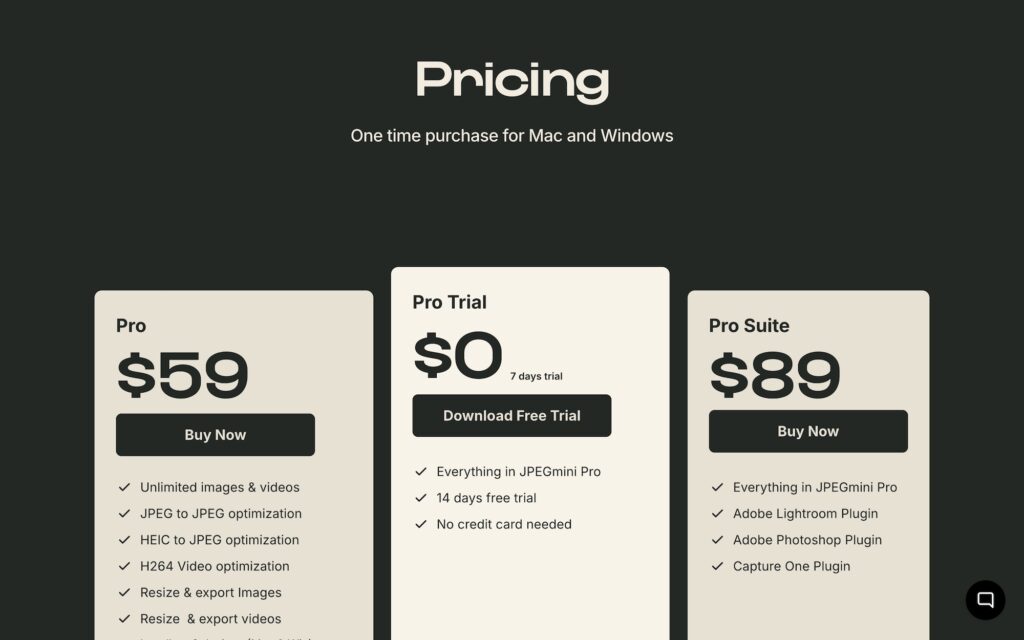
If you’re dealing with a large batch of photos, you might want to try JPEGmini. You can download their desktop app and drag images into the app for compression. The best part? It automatically replaces the originals with compressed versions, saving time and avoiding duplicate files. And all without sacrificing quality!
JPEGmini also comes with a pro version, featuring a plugin that lets you export your optimized photos straight from Lightroom and Photoshop, making it a perfect choice for photographers.
Compress PNG images
To compress PNGs, you can use the free tool TinyPNG. Here too, there is a limit of 20 images at a time with a max file size of 5GB.
4. Add alt-text to your images
Alt-text, short for ‘alternative text’, is like a little helper that you add to an image to describe what it’s about.
Why’s alt-text important? Let’s break it down:
- It tells search engines what your image is about, helping boost your site’s visibility.
- It pops up when images don’t load
- It’s voiced by screen readers for visually impaired users, ensuring everyone can access your site.
How to write effective alt-text:
Here are some guidelines recommended by Google:
- Be short but descriptive. So don’t write ‘puppy’, but rather ‘puppy playing with a ball’.
- Use max 1 to 2 sentences.
- You don’t need to say ‘Image of’ (e.g., ‘Image of Labrador puppy’), but do indicate if the image is a logo or an illustration.
- Use keywords in your alt-text, but don’t overdo it (keyword stuffing). So don’t write ‘puppy dog pup labrador jack russell german shepherd dogs’.
- If the image doesn’t contribute to your webpage or blog article, leave the alt-text out.
Adding alt-text in Showit:
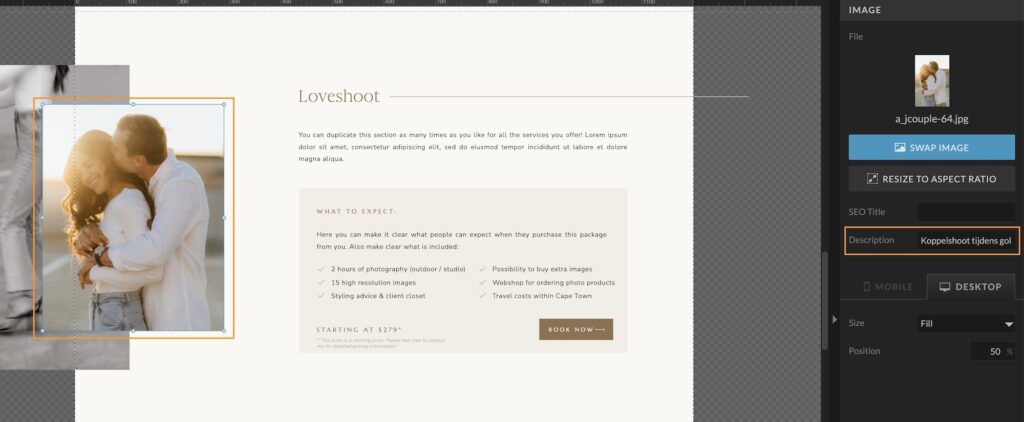
Adding alt-text in Showit is super easy. Just click on the image and on the right side, you’ll see the ‘Description’ box where you can pop in your alt-text. That’s it!
Adding alt-text in WordPress:
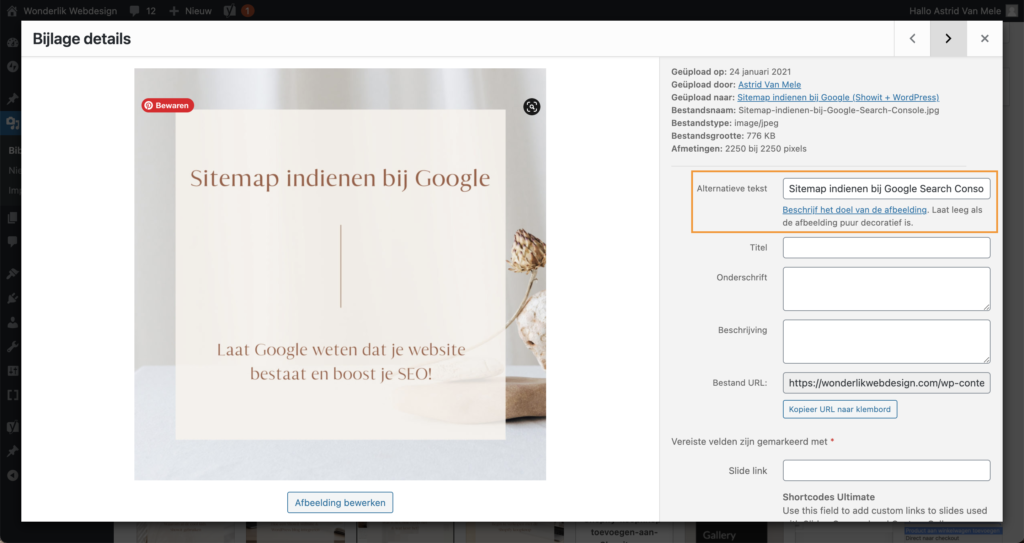
To add alt-text to images in WordPress, simply head to your media library, pick the image you want to update and then pop the alt-text into the ‘Alternative text’ box on the right.
Want to learn more about SEO?
Ready to take your SEO game to the next level? Dive into my other blogs for step-by-step guidance on using Showit SEO tools and enhancing your blogs with the Yoast SEO plugin!
Ever wondered what tools I rely on daily to keep my website, marketing and workflow running smoothly? I've put together a list just for you so you can spend more time doing what you truly love!
My favorite tools & resources for creatives
Read more ...
